So, you may be asking…why meal plans? Well, with six people to feed, three kids in school and a chemical-free lifestyle, I really need to keep track of our food bill! Creating a meal plan for the week helps me to keep track of what we have in the house, what I need to restock, and what elements of the meals I can reuse. And, of course, the reason for posting them here is in hopes that you might get some ideas to help your family.
You can expect to find links to recipes I’ve found online, information about & reviews of recipes from cookbooks, well-rounded lunchbox ideas (don’t we all need those???), food product reviews, and photos. The reason why I offer brand names and product reviews is because I know there are lots of moms out there who don’t have time to read labels and try to find better ways to get healthier food for their families. I’m hoping these reviews will be helpful!!!
You may also be asking why the week begins on Monday and ends on Thursday. On the weekends, we use up the leftovers from the week and sometimes go out to eat. You’ll find Friday’s meal plan (and other fun stuff!) under the Family Friday Tradition category.
So, on to the plan! Any text you see in purple is an original recipe. I hope you like them! They can also be found under the Recipes category.
Monday:
Lunch ~ Boar’s Head Everroast chicken & Muenster cheese sandwiches, hot house cucumber sticks with ranch dip, and a Dole Fruit Bowl in Gel.
Yum! I love this chicken. I usually only get a half pound of it because any more ends up getting wasted (it’s exactly the right amount for three kid sandwiches and two grown-up versions). So, the kids will see some form of chicken or turkey sandwich in their lunchbox every Monday. Sandwich bread is also a very tricky item to find, health-wise. Granted, packaged bread isn’t healthy in the first place, but choosing a good one is important to me. My current favorite is Arnold’s Soft Honey Wheat. It doesn’t have corn syrup, the flour is unbleached, there is no soy flour (some soybean oil and soy lecithin), and minimal dough conditioners/preservatives.
Hot house (English) cucumbers don’t have seeds, and their skin is thin – much yummier than the other kinds, especially dipped in ranch. The Dole Fruit Bowls in Gel can be tricky. Most of them have artificial colors, but the black cherry one is colored with cochineal extract (It is a natural color, but don’t look it up unless you really want to know what it is!). They do have some artificial flavor added, but in amounts this small, I sometimes let that slide. This was our first time trying these fruit bowls, and they were a big hit with the kids!
Dinner ~ Kickin’ Chicken Thighs & Drums, Alexia ruffle french fries, Bush’s maple baked beans
Kickin’ Chicken kicks some serious chicken booty! Man, this stuff is good! I got this recipe from Kid Favorites Made Healthy from Better Homes and Gardens. It is a simple baked chicken with a customized BBQ sauce that includes ketchup, orange juice, and hot sauce (we like Frank’s). I modified the recipe (I always do that!) and used chicken thighs and drumsticks with skin on. The skin keeps the meat moist and juicy – you don’t have to eat it, but it sure is good! I like to rub the chicken with a little oil and salt & pepper them, put them under the broiler until the skin is nice and crispy, then switch the oven over to 375° to finish the cooking. I use a digital probe thermometer (one of my favorite kitchen tools!) while it cooks to make sure it hits 180°.
I love Alexia’s convenient potato sides, and Bush’s beans are a great standby side dish with lots of protein (and the kids like ’em!).
Tuesday:
Lunch ~ salad with raisins and cucumbers, ranch dressing, cheese stick, and Robert’s Veggie Booty
Salad with raisins? Heck, yes! A little burst of chewy sweetness is delicious in a quick, green salad. This salad gives me another opportunity to make use of the cucumber I got for Monday’s lunch. I’ve found that buying heads of romaine can sometimes lead to waste, so I try to plan on exactly when we’ll have salad and get a bag mix of something other than iceberg (Dr. Jim Sears once told me his family calls iceberg “see through lettuce” because it has no nutritional value! Funny, and so true!).
Cheese sticks are great for calcium and protein, and we LOVE Veggie Booty! I’ll do anything to sneak in extra veggies when I can. Even our pickiest of picky eaters, Derrick, will eat these. Kaitie & Gracie would eat them like candy when they were toddlers. Good stuff.
Dinner ~
Chicken and veggie soup with Rice
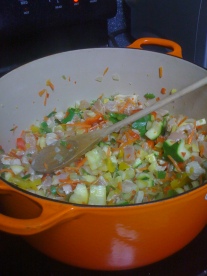
A meal in a bowl – gotta love homemade soup! This is my recipe. It requires two days, so make sure you plan to make your stock on the day before you want to serve the soup. This is a great way to use veggies that are slightly past their prime and the little garlic cloves in the middle of the head. No need to be fancy! Throw in some baby carrots! Don’t peel the onion – the skin gives the stock nice color! Don’t peel the garlic, either, just use up that head by cutting it in half to expose the cloves down the middle. Making the stock is super easy, but time consuming. Putting the soup together is ridiculously simple, though! This makes enough stock to use for a dinner and frozen supply for recipes later.
Enjoy!
Chicken Stock:
1 large fryer chicken (4 – 5 pounds)
2 carrots
1 medium onion
a few cloves of garlic
2 celery stalks
1 bay leaf
1/2 teaspoon of peppercorns
1 Tablespoon sea salt
1 Tablespoon cooking oil
Pre-heat a large, heavy-bottomed stock pot on medium heat (I use my big honkin’ Le Creuset enameled cast iron pot that I love.). Add the vegetable oil, carrots, celery, onion,garlic, bay leaf, and the contents of the gizzard packet from inside the chicken. Yes, really. Allow the veggies to soften slightly and release their yummy aromatics. Stir to prevent burning. Add the whole chicken and cover with water. Cover and simmer on medium-low for at least 2 hours.
After 2 hours, check the chicken for readiness by pulling the meat away from the bone with the fork. If it doesn’t start to pull away, it’s not done. Once the chicken is loosey goosey, remove it from the pot. Using a boning or other small knife and a pair of kitchen tongs, remove all the meat from the carcass. Return the carcass to the stock pot and simmer, covered, for another 2 hours or more. Store the chicken in the refrigerator for adding to the soup later.
Once your home is filled with the delicious smell of chicken soup, it’s time to strain the soup and store it. Place a large mixing bowl (preferably one with a pouring spout) in your sink. Inside the bowl, place a strainer with small holes (the metal wire mesh ones work best) inside the mixing bowl. Carefully pour the stock into the bowl until it’s full. Remove the strainer and pour the strained stock into lidded food storage containers. Repeat with the rest of the stock still in the pot. Discard carcass and veggies. Don’t worry about the fat on top. When the stock cools in the fridge, it will gelatinize, and you can easily remove it if it bothers you.
To assemble the chicken soup with rice, reheat an appropriate amount of stock for the number of people you will be serving. Once it is warmed, taste it to see how much salt you need to add to bring out the flavor. Cut the cooked chicken into bite size pieces and add it to the stock, along with your favorite soup veggies. I like to use frozen organic corn and frozen peas & carrots blend. Add cooked rice to complete the soup. A sprinkling of fresh minced flat-leaf (Italian) parsley is a nice touch just before serving.
Wednesday:
Lunch ~ Peanut butter and apple sandwich on Banana Bread, baby carrots with ranch dip, and Newman’s organic pretzel sticks
This sammy is a nice change from the routine pb&j. I use my mandolin (V slicer) to slice the apples after I core them. Lemonade is a favorite beverage around here, so I usually have some on hand. I pour a little into a bowl and dip the sliced apples in it right after slicing so they don’t brown. Smucker’s organic (the best peanut butter ever) crunchy peanut butter adds a nice texture, but if your kids are anti-nut, go with their creamy version. I made the banana bread with the Simply Organic Gluten Free Banana Bread Mix. The kids loved it, ooh-ing and aah-ing over the smell of cinnamon that filled the house while it was baking! I found the bread to be a bit sticky, so I toasted it before I built the sandwich.
The baby carrots I’m using for this lunch were also used for the chicken stock the day before. The kids like the Newman’s pretzel sticks, but I think they are too crunchy. I like the Snyder’s of Hanover organic pretzels best. Yum! Anyway… on to….
Dinner ~ Grama’s Meat Loaf, the Second Generation with green beans and mashed potatoes
This is my variation on my Grama’s meat loaf recipe. It’s only slightly different from hers, but I still remember making it with her, especially the part where we dig our hands in to mix it! There are no exact measurements to this recipe, as with all of my Grama’s recipes, so I’m going to give you my estimate of what they are.
I prefer fresh green beans to frozen, so I always grab a bag of them at the store. My favorite potatoes to use for mashers is the Yukon Gold. They are so buttery and yummy!
Gramma’s Meat Loaf, the Second Generation
1 pound ground beef (I use Publix Market ground beef – it is the fresh ground trim from all the steaks they cut that day!)
1 pound ground pork
about a cup of Italian style bread crumbs
about a half of a cup of ketchup (or more, if you like)
about a quarter of a cup of whole milk
1 egg, lightly beaten
about a half of a tablespoon of your favorite seasoning blend (Grama used Lawry’s Seasoned Salt, I like Emeril’s Essence)
half of a bag of frozen peas and carrots blend, defrosted
Place all ingredients in a big bowl, take off your jewelry, and dig in! Once the ingredients are all combined, pack the mixture into a large loaf pan coated with cooking spray. Then tip the loaf out onto a cookie sheet lined with aluminum foil and sprayed with cooking spray. Pat the loaf back into its brick shape wherever necessary, then bake in a 375° oven for 10 minutes to allow the top to brown. Insert a probe thermometer (or use an instant read) and cook at 350° until done. Then mix up the glaze!
Meat Loaf Glaze
ketchup
brown sugar
Worcestershire sauce
All of these ingredients are to taste. I use about a half a cup of ketchup, a quarter of a cup of Worcestershire, and about a quarter of a cup of brown sugar. Mix thoroughly in a bowl and brush over the meat loaf while it is baking. Serve the rest drizzled over slices of meat loaf. Yum!
Thursday:
Lunch ~ Walmostdorf Chicken Salad, cucumbers with ranch, EnviroKids rice crisp bar
I love this chicken salad! It’s so yummy, and a great way to use up leftover chicken – in this case, the meat from the chicken used to make the stock earlier in the week. It is best to make this the night before so that the flavors can make friends, but it will still taste good by lunchtime if you forget.
The EnviroKids bars are just like rice crispy treats, but they don’t have corn syrup or preservatives and are made with brown rice. The kids love them – so do I! Also, here’s another opportunity to make sure the whole cucumber gets used up. They are big!
Walmostdorf Chicken Salad
meat from one whole chicken
2 small to medium apples (we like gala or fuji)
one celery stalk
a large handful of red or white grapes (about a cup or so)
1/2 cup mayonnaise (or more if you like it really creamy)
1 teaspoon dried thyme
salt and black pepper to taste
Dice the chicken into small bite-size chunks. Core and dice the apple. Halve all the grapes. Dice the celery. Add all ingredients to a bowl, mix thoroughly, cover, and refrigerate. Enjoy! Yum!
Dinner ~ Bon Temps Chicken Wings with mixed veggies (corn, peas, carrots, and sugar snap peas – our favorite blend)
Publix makes these phenomenal chicken wings that they call Mardi Gras Chicken Wings. Honestly, these are some of the only chicken wings I like. I love them, but restaurants seem to overcook them like 90% of the time. Blech! The problems with the Publix wings are that they are crazy expensive and I don’t know what kinds of additives are in their seasoning blend (like MSG, for example). So, since Adam is a wing fanatic, I decided to try to duplicate the seasoning they use. This is pretty darn close! I have mixed up a big portion of the seasoning blend to keep on hand in a food storage container in the spice cabinet – just keep the ratio the same when you measure.
Bon Temps Chicken Wings
“family size” package of chicken wings (or two regular size packages)
1 tablespoon light olive oil
1 tablespoon paprika
1 tablespoon crushed rosemary (whole rosemary is fine, but run your knife through it to make the pieces small)
1 tablespoon oregano
1 tablespoon thyme
1 teaspoon cayenne pepper (or more, if you like it hotter)
1 teaspoon fine sea salt
1 teaspoon black pepper
Preheat broiler. Remove the wing tips from the chicken wings. Open the wings into a “v” shape, then cut the skin down the middle to open up the wing to the joint. Place all ingredients into a large food storage container with a lid or a large zip top bag. Shake thoroughly to coat the wings evenly with the oil and seasonings. Open the wings and place them skin side up on a large baking sheet. Broil them until the skin is medium brown and crispy. Check the temperature of the wings with a probe thermometer and check to see if the juices are running clear. If they have not yet reached 180°, switch the over over to bake them at 350° until the temperature of the wings reaches at least 175° (carryover cooking will take care of the rest).
Check out the Family Friday section for Friday’s menu!
Read Full Post »


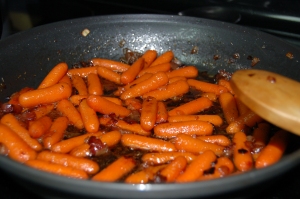
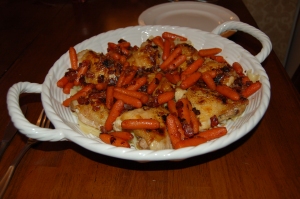 Cook an appropriate amount of the egg noodles for the number of people you are serving. Turn the oven on broil. Place the chicken thighs, skin side up, on a broiler-safe baking sheet. Oil, salt and pepper the chicken. Broil the chicken until the skin is crispy and the internal temperature reaches 175°.
