Feeds:
Posts
Comments


Paleo Coconut Cookies
(adapted from Make It Paleo)

Makes 24 cookies

Ingredients:

1 cup almond meal
1/4 cup flax seed meal
1/4 cup shredded coconut
1/2 Tablespoon cinnamon
1/2 teaspoon salt
1/2 teaspoon baking soda
1 egg
1/4 cup maple syrup
1/2 teaspoon vanilla extract
1/4 cup coconut oil

1. Preheat oven to 325 F.
2. In a large bowl, combine dry ingredients.
3. In a small mixing bowl, combine the rest of the ingredients with a hand mixer.
4. Stir wet ingredients into dry ingredients.
5. Spray a cookie sheet lightly with cooking spray, or use parchment. Drop tablespoon-sized amounts of batter.
6. Bake cookies for 15 minutes.
7. Allow cookies to cool, then serve.


Derrick - "A Gloomy Day"


This poem is called “A Gloomy Day”, and I wrote this because sometimes I feel this way.

Rat Stew, by Gracie

This is a funny recipie I made up – don’t try to make it because it is not real.  I wanted to make it up because I think it is funny.


Starting this month, each family member will be creating at least one blog post monthly. The idea is to give the kids choices about what they would like to write about as well as provide work samples for their portfolio.

I hope everyone will enjoy seeing their creations! It would be a BIG help if their readers would leave constructive comments on their work. Thank you!

Here are the instructions I wrote for the kids to help them choose a subject:

Family Blogazine

Each month we will create a magazine together. It is up to you to decide what aspect of the magazine you wish to create. We will also include original illustrations and photographs.

Here are some ideas:

First person experience – Write an article about something you have experienced. An example of this would be an article about going to a museum. Explain what you liked and disliked about the experience, as well as your general opinion about it.

Biography – Write an article that gives interesting details about the life of another person, living or dead. An example of this would be an article about Abraham Lincoln, Lady Ga Ga, or a family member.

Instructional article – Write an article that tells the reader how to do something interesting. An example of this would be an article explaining how to pack and prepare for a fun camping trip.

Recipe – Write an article that describes and lists instructions for an original recipe that you created. An example would be a recipe for a smoothie that describes how you thought of it and why people should try it.

Movie, Book, or Game review – Write an article that describes the positive and negative points of something you have seen, read, or played. An example would be a review of Little Big Planet, including what you like about it and dislike about it. You would also include your general opinion of the game and express why you think your reader would or would not want to play.

Fictional story – Write a short story about anything you like!

Poetry – Write one or more poems about anything you like in any style you like. You can draw illustrations for them, if you like.

Humor – Write a funny article about anything you like. For examples of this, check out Dave Barry. Another option is to create a collection of original jokes.

Workbox Love


Ever since our homeschool journey began, the kids and I have been in a constant state of organizational evolution. My three bigs are not the most organized or diligent, so I’m always trying to improve our system to make learning more accessible to them.  We’ve tried 3-ring binders, folders, and online programs among other things.  And then…sweet serendipity stuck. A conversation with one of my nearest and dearest fellow homeschoolers revealed that she uses workboxes.

Workboxes? Hmmm…

So, naturally, I spend hours scoring the web for information about this little gem of information. I was rewarded immeasurably for my efforts.

This system allows the kids to see what they have to do for the day, manage their time, learn independently, and watch with pride as they make their way through their assignments. I modified the system to fit our needs.

Without further ado, here are our workboxes…


our workbox shelves

There are boxes for three kiddos on this shelf. It is an Ikea BESTÅ shelf, about 4′ wide. The boxes were purchased at Walmart; the small shoebox size were $1 each, and the larger blue ones were about $3. I printed the numbers and time cards on heavy cardstock (150 lb. I think? purchased at Office Depot) I haven’t had great experience with cutting velcro strips (it gums up my scissors), so I bought the little circles to save myself the trouble.

Each kiddo has an inexpensive kitchen timer (Target, $6). On each numbered box is a tag with a generous amount of time during which they work on each assignment. Their goal is to practice focus and diligence in order to get the assignment finished. If they do, they earn the number of points equal to the number on the time card. If not, the assignment goes back onto the shelf to be worked on the next day. Second day completion is rewarded with half points. If their focus continues to be poor, the point value drops down to 5 and stays there. For the record, they are given ample time and assignments that they are fully capable of completing. Their success is based on their own choices and time management.

Once the assignment is completed, they place their work into a bin on my desk. The empty box is placed on a separate shelf next to the workbox area so that they have a clear visual representation of their diligence. It’s amazing how such a simple thing keeps them motivated. We never achieved anything even similar to that with any other system.

our reward box...points redeemed here

Here’s the purpose of the points: My kiddos are very much instant-gratification junkies. If they have to plan more than about a week ahead, they completely lose interest, and their goal no longer motivates them. They earn points for being diligent with their chores and schoolwork. I have a reward box containing all sorts of little things they love (candies, silly bands, erasers, pencils) and activity cards for things they love to do (computer time, video game time, etc.). They can save up their points for “big ticket” items or spend them on little things.

keeping things in order

Now, each kid has a chart to help them keep track of their accomplishments and activities for the day. The tags are stored in the “bank” at the bottom and moved up to the top as they are completed or used. Here’s how this breaks down…

They have three chore tags each (morning, afternoon, and evening). Splitting up their daily responsibilities really helps them to not feel overwhelmed. They also have three “break” tags that total once hour, divided into 10, 20, and 30 minute segments. It is entirely up to the kids how they use them, the only rule being that they must be in between assignments. There are also three “help” tags. Their goal is to try to figure things out on their own as much as possible rather than giving up quickly and asking for help right away. Again, they are never given any assignments that are outside of their individual abilities. They also have a snack tag and a lunch tag. For some reason, my kiddos are obsessed about when lunchtime is every day, so they like to move up a tag after they’ve eaten. It’s the little things, I guess. If we are going to be enjoying a planned activity such as a park day, I put a “playground” tag on the chart. If we have no planned activity, I put the “go outside” tag up to make sure they get out for some fresh air at some point during the day.

Each day, their core subjects and electives tags are placed on the chart, as well. Our core subjects are English and Math. The kiddos get to choose their own topic in each of five other subjects: science, reading, history, arts, and life skills. For example, one of them is currently studying the human brain, Bridge to Terabithia, North America, bird watching, and wilderness survival.

I hope these ideas help you! Please feel free to ask if you have any questions. 🙂

I have had a serious chili craving recently. Really serious. The kind that sits atop a mountain of buttered noodles and is crowned with cheddar cheese and sour cream.

So, where do I turn when serious cravings strike? Smitten Kitchen, of course. But (and I’m certain Deb would understand this) I HAD to play with the recipe. There were simply things that I needed. Craved. Loved in my chili. And I skipped the biscuits in favor of pasta and toppings.

So, without further ado, here is my version of the recipe.

Entirely Non-Texan Beef Chili with Veggies

about 3 cups of diced onions (I used 6 small onions)

1/4 cup + 1 T chili powder (this is what I had left in the bottle – and I added more ingredients, so it made sense to add more)

3 1/2 pounds ground beef

1 T ground cumin

2 T paprika

1 T fresh oregano, minced

1T fresh flat leaf parsley, minced

1 t dried red pepper flakes

1 jar of Classico Fire Roasted Tomato and garlic pasta sauce (I don’t like using canned tomatoes – the cans are lined with plastic containing BPA. I use pasta sauce in place of canned tomato sauce. It’s fantastic!)

2 8-ounce cartons of chicken broth (I use Pacific)

3 T apple cider vinegar

1 large can of cannellini beans (white kidney beans)

1 can of black beans

1 can of corn (I use Greenwise organic corn to avoid GMOs.)

1 large green bell pepper, diced

2 t salt

1 t black pepper


In a very large pot (I used my huge Le Creuset), heat the oil over moderately low heat and cook the onions in it for 10 minutes, until translucent. Add the garlic and carrots and cook for one minute more. Raise the heat to medium and add the beef, stirring and breaking up any lumps until it is no longer pink, about 10 minutes. Add the chili powder, cumin, paprika, oregano, parsley, and pepper flakes and cook for another minute. Add the tomato sauce, broth and vinegar and simmer the chili, covered, for 40 minutes. Add the cannellini beans, black beans, corn, bell peppers, salt & pepper. Simmer for an additional 20 minutes, until the bell peppers are tender.

Serve over buttered spaghetti, top with shredded cheddar cheese and a dollop of sour cream.


Enjoy! Try not to eat it all in one sitting. =09


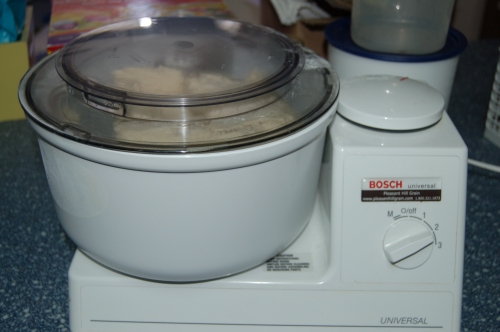
Today, stuck between a rock and a paycheck, I decided to conquer my fear of baking bread. I mean, we had all the ingredients in the cabinet, after all. What was to stop me? I even have a Bosch mixer collecting dust in the back of the cabinet. Sacrilege, I know. There’s a NutriMill in there, too. O_o

So after apologizing to my long-neglected Bosch, I cleaned it up and put it to work. I found several different recipes that I thought would work based on what I had. This one fit the bill – simple and practical.

I don’t have a good history with bread baking. I have always killed the yeast and never had much success with rise. Ok, none. But, clearly, I had good intentions when I purchased my mixer/grinder set years ago. Imagine my delight to see bubbles in my mixer!

It worked! It really worked! I took the advice of Crystal at The Family Homestead and didn’t use a thermometer like I’d always done before. I just heated two of the three cups of water a bit – to where it was not-quite-too-hot – then added the third cup of water in at room temperature. I put the sugar in the mixer with the water, whizzed it around a bit, then added the yeast. Imagine that! All these years I’ve just been too anal for my own good.

Yes, it’s white bread. No, it’s not particularly healthy. It is, though, unbleached King Arthur bread flour, so it’s not too completely bad. Shush. Let me justify my lack of whole wheat flour in peace. I did modify the recipe a bit and used melted butter instead of oil. I was pleased with the results. I’m looking forward to substituting half of the flour for whole wheat next time.

Then…the fun part. Monitoring the rodeo that is the Bosch mixer at work. This is the mixer operating in second gear, bucking and jumping on my counter, threatening to do a swan dive to the floor. I’m surprised this photo came out as clear as it did, seeing a I had to briefly take my hand off the mixer to snap it quickly before grabbing it again.

The thing that I have come to adore about the Bosch is that I do not have to knead the dough. Really. Five minutes of yeehaw and out pops a perfect round of dough, ready to cut and place into my motley crew of loaf pans. One rise time is all that is needed. No punching down. Does it get any better than that? I think not.

I’ve never had bread play this nicely before! What a feeling! But then, they hadn’t been baked yet. Fingers firmly crossed, I entrusted their care to my oven for half an hour. The smell was torture. Kaitie was convinced that I was making coconut bread – apparently yeast smells like coconut to her. Derrick was waxing poetic about the fact that he had never had homemade bread before and was excited to try it. Gracie kept sneaking into the kitchen, her little button nose poking around at counter level, hoping to be there when it first came out of the oven.

She was rewarded with a first sniff of the amazing results!

I’m still in awe that I beat my yeasty demon. Three loaves survived the evening to be made into grilled cheeses and pb&js this week.

Happy, happy day. 🙂

This slideshow requires JavaScript.

I imagine some of you are still drooling over the chocolate chip cookies from my recent post. Here’s an update on the goings on in the cookie department…

On the day after, the cookies lost some of their appeal to me. The texture was still chewy and dreamy, but the flavor had become far to one-dimensional. Now, seeing as these lovelies will probably be sold on the day after, that just won’t do. So after a careful evaluation of the flavor profiles, I edited the recipe and got back on the chocolate chip cookie horse.

The results are chilling in the fridge for the night…

What’s that? Escargot Candy? Oh, yes. I’m getting to that.

So I’ve been trying to figure out what to do with the extra egg whites that are available post-chocolate chip cookie dough creation. Then I remembered my true candy love – Escargot. No, no, no. There are no snails harmed in the making of this sweet treat. The final candy is just shaped like one. 🙂


The first layer is fluffy, sweet, homemade marshmallow. Mmmmmmmmmmmmmmmmmmmmm! =09

The second layer is a dark, rich, salty caramel. It really is irresistible. I can still taste it…chewy and satisfyingly carame…..oh. Sorry. I’m teasing you, aren’t I?

Ahem.

So the caramel gets spread across the top of the marshmallow, and they set up together in the chill chest.

Tomorrow, it will be cut, shaped, and dipped into dark chocolate.

Yes, really. You’ll see! I’ll put some pics up tomorrow. 🙂

Sweet dreams!


UPDATE:

To make the escargot, layer a batch of homemade caramel on a parchment lined half sheet pan.

Then, after the caramel has cooled, layer a batch of homemade marshmallow right on top. I use Alton Brown’s recipe.

Once everything has cooled enough to touch, cut strips of candy and roll them. Then dip in melted chocolate. YUM! NOTE: If the rolling is too complicated, just cut the candy into squares and dip. It’s just as good!